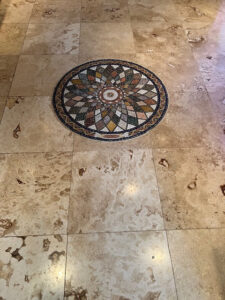
A handmade mosaic can last for centuries, but only if the surface behind it is right. Most installation problems we hear about have nothing to do with the mosaic itself: they come from a wall that was not flat, a floor that flexed, or adhesive that did not suit the location. This guide covers what to check and prepare before your mosaic arrives. For the step-by-step setting process, Mozaico has video instructions on how to install a mosaic, along with the tools and materials it uses.
1. Check the surface
- Flat. Lay a long straight edge across the surface in several directions. Dips and bumps of more than a few millimetres will show through a mosaic, especially a geometric one. Fill or skim them first.
- Solid. Tap the wall. Hollow-sounding plaster or loose render should be repaired. A mosaic is heavier than paint and needs a sound base.
- Clean and dry. Remove dust, grease, old paint that is flaking and any wallpaper. New plaster or screed needs time to cure fully before anything is bonded to it.
- Rigid. Floors must not flex. Timber floors usually need a cement backer board or a suitable underlayment before stone or glass is laid.
2. Know your location
Where the mosaic goes changes what you need:
- Dry interior walls are the simplest. A good cement-based tile adhesive (thinset) on a primed, sound wall is usually enough.
- Showers, pools and fountains need waterproofing behind the mosaic and adhesives and grouts rated for constant water. Epoxy grout is often the best choice here.
- Outdoor walls and floors face frost, sun and movement. Use exterior-rated, flexible adhesive, and plan for movement joints on large areas.
- Floors need materials suited to foot traffic. Marble floor mosaics are usually sealed after grouting.
3. Plan the layout before you open the adhesive
Unpack the mosaic and lay it out dry on a clean floor, in order, to check every section is there and to see how it fits together. Mark the centre lines of the mosaic on the wall or floor, and check them with a level. Decide where the edges will sit relative to doors, windows, switches and corners. It is much easier to adjust a pencil line than a section that is already bonded.
4. Gather the tools
A typical installation needs a notched trowel, a flat trowel, a grout float, sponges, buckets, a level, a straight edge, a utility knife and the adhesive and grout suited to your location. Have everything ready before you start mixing: adhesive has a working time, and you do not want to be searching for a sponge while it sets.
5. Decide who will install it
Many clients install smaller wall pieces themselves. For large panels, floors, pools and anything outdoors, we recommend an experienced tile setter, ideally one who has worked with natural stone or glass mosaic before. Share the layout plan and this checklist with them in advance.
After installation
Let the grout cure fully before cleaning with anything more than water. Seal marble according to the sealer’s instructions, and reseal floors and wet areas periodically. Clean with pH-neutral cleaners; acidic products such as vinegar can etch marble.
A well-prepared surface is the difference between a mosaic that looks good for a few years and one your grandchildren will still be looking at.